
Here's how an Automate user streamlined customer interaction with Outlook automation using an Automate task for Microsoft Dynamics CRM and Exchange.
The company had the following requirements:
- Monitor for all inbound email inquiries to a specific inbox
- Check sender email address against Dynamics CRM database
- If match:
- Append activity to existing record
- Forward email to the sales representative of record for further follow up
- If no match:
- Create new record
- Assign sales representative of record
- Auto-generate introductory email reply with attachment and website links
- Inform sales rep of new lead
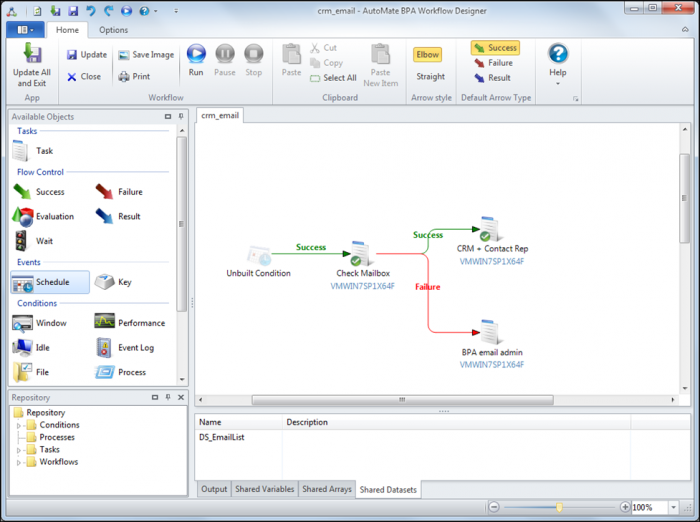
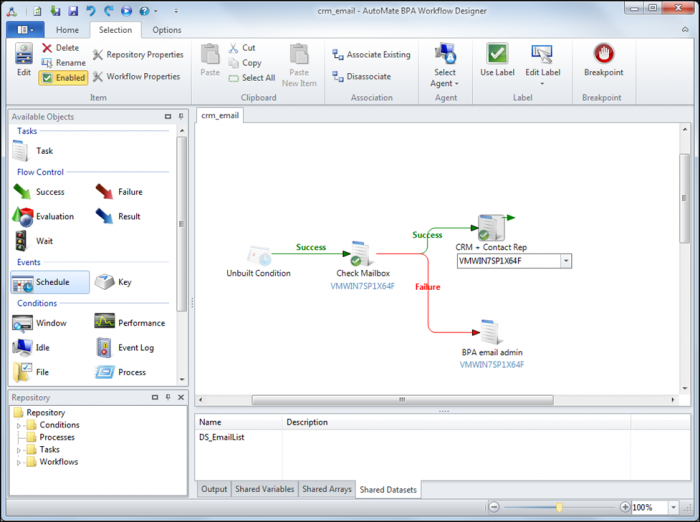
The email automation workflow that we came up with can be seen below. We are using a schedule trigger to kick off our workflow. The workflow will get the current emails listing in the Check Mailbox Task. If this is successful, then it will handle the name check in the CRM+Contact Rep Task. If the Check mailbox Task is unsuccessful, then we will email our administrator.
To monitor the mailbox we are going to use a Schedule Trigger. With the schedule trigger you can define a particular interval to poll the inbox. For this particular example, we are going to have it run every 15 minutes.
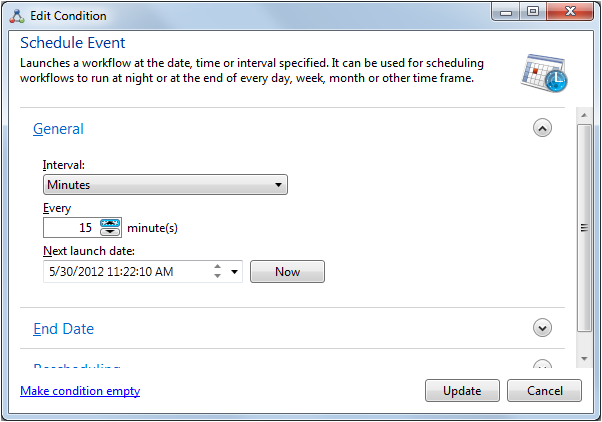
Once you have made the appropriate selections, click update.
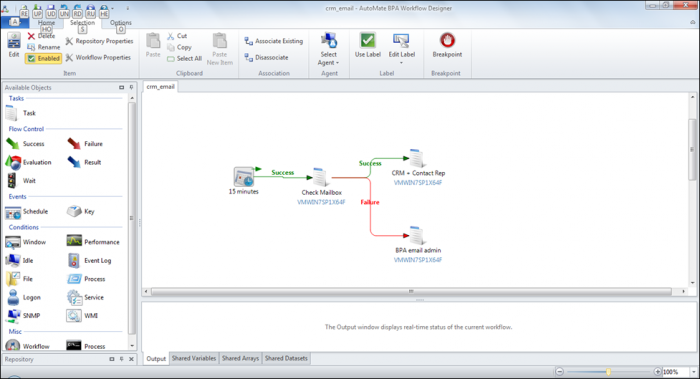
Now that we have defined our polling interval, we need to actually start filling in the task elements. Right click on the Check Mailbox task and select “Edit.” This should open up the task builder.
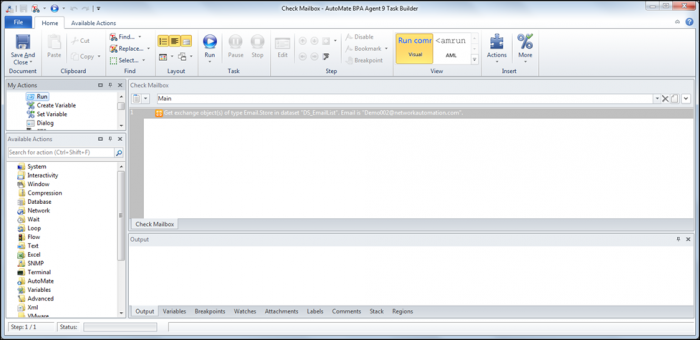
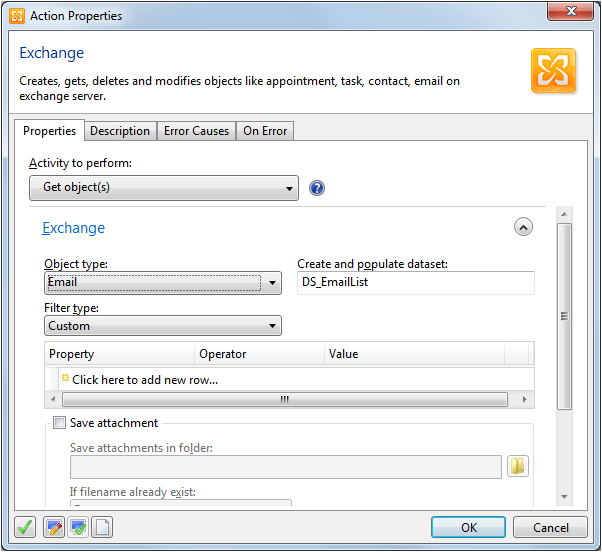
Inside here you need to use the Exchange Action. (It can be found under the Network folder). Select “Get Object(s)” from the activity to perform. This will tell Automate that you are trying to retrieve items from Exchange. Under the Object type, select “E-mail” because you are trying to retrieve all the current messages. Note that I am using a Shared Dataset for the value DS_EmailList so that it is visible to every element in my workflow.
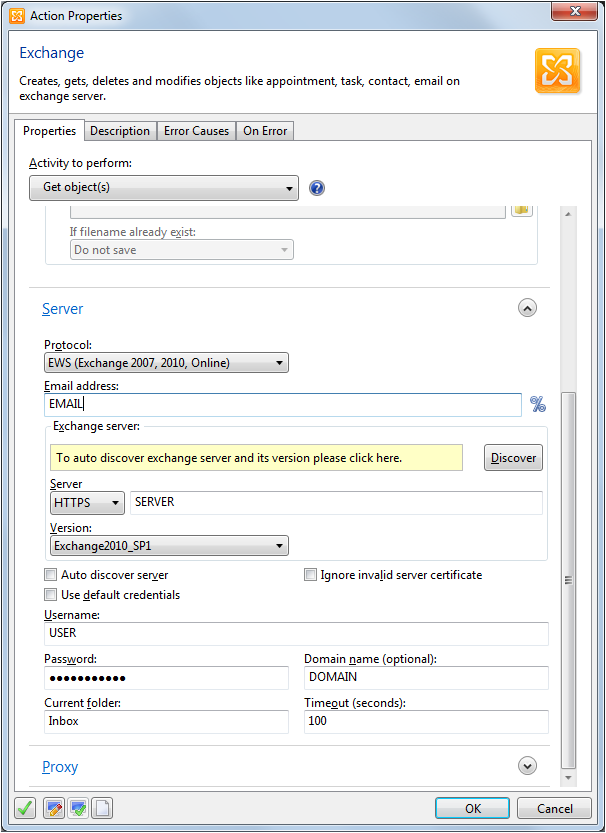
Once you have specified the object types that you want, scroll down to the “Server” section. This is where you define your Exchange version/username/password/server path information. Once you have filled in all of the appropriate information, click OK.
That is the only step that is involved for the Check Mailbox task. Save it and close. This should bring you back to the workflow designer. Now we need to work on the CRM + Contact Rep task. Right click on the task and select Edit.
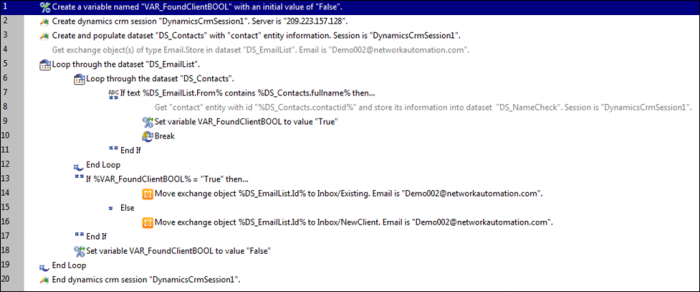
This should open up the task builder for the CRM+Contact Rep Task.
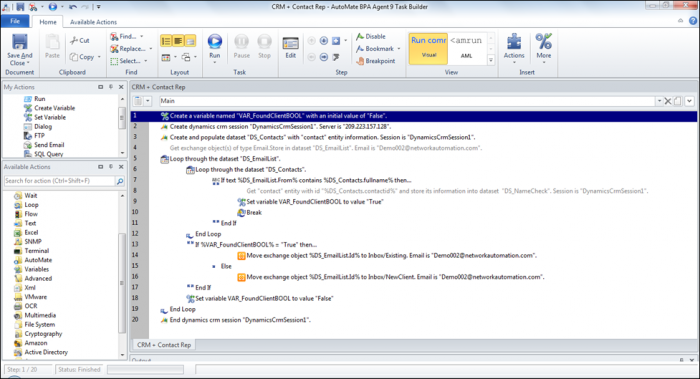
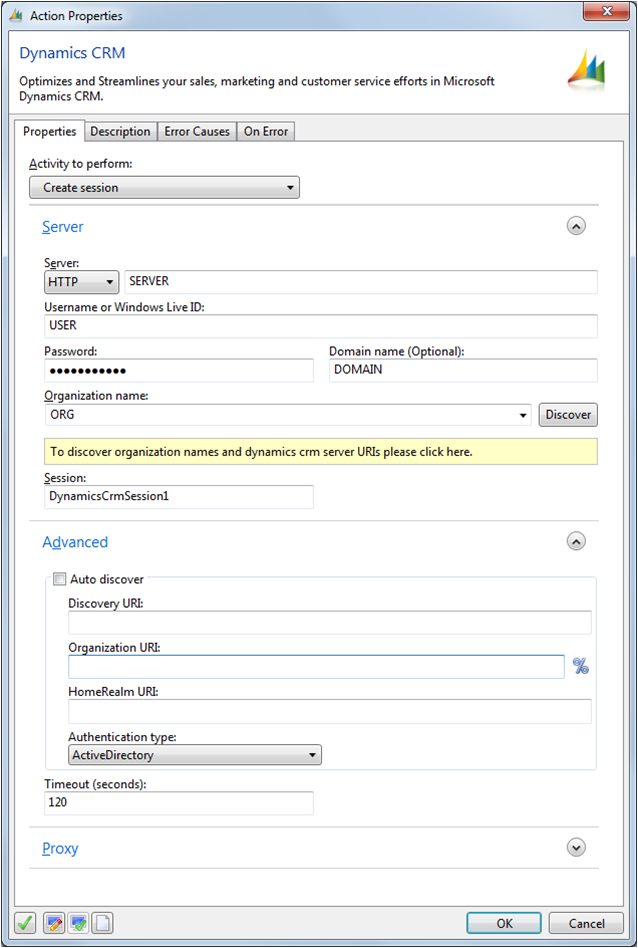
Step 1 - Define Variable. Select “Create Variable” from the available action palate on the bottom left corner. In my case, I’ve called it VAR_FoundClientBOOL
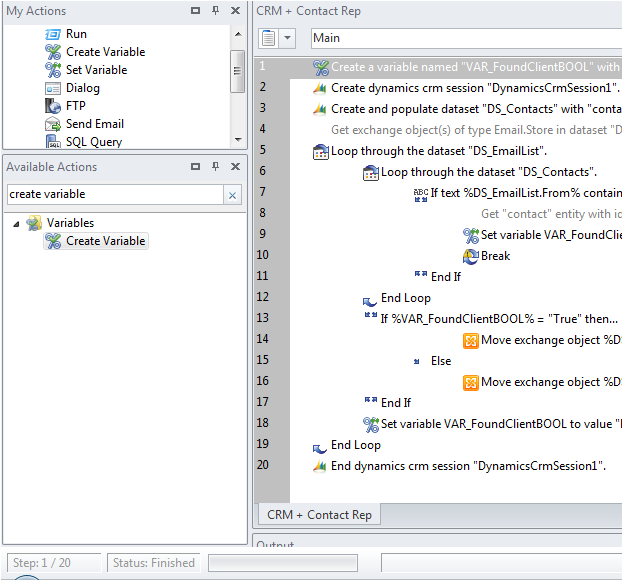
Step 2 – Open a connection to Dynamics CRM. To do this, drag over the Dynamics CRM action located in the CRM folder. Under the Activities to perform drop down, select create session. Also be sure to fill in the appropriate information for Server/username/password and organization.
Step 3 – Once you have defined a session, the next thing you want to do is grab a list of your current contacts. This is so you have something to compare the email addresses against. To do so, drag over another Dynamics CRM action over and select the “List Entity” action. Under the Logical name, specify “contact”. Under the query type, select Expression and then you can chose which columns you want returned. The Server section should be set to Session based.
Step 5 – Now we are going to loop through the contents of the Email List. Select the Loop Dataset action from the Available actions and specify the DS_EmailList dataset. Now while we check each of the emails that we have, we need to check the sender against our CRM Contact list. Which leads us to Step 6.
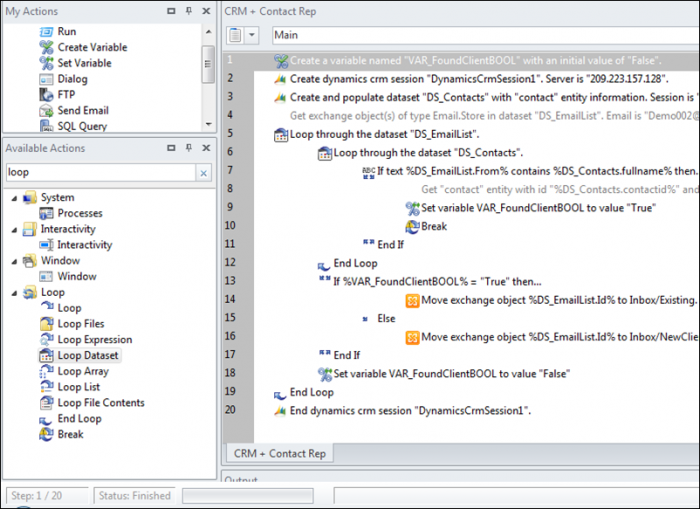
Step 6 – Drag over another Loop Dataset action and this time specify the DS_Contact dataset. What this will do is check each email sender against your CRM contacts.

Step 7 – This checks to see if the email sender is in your CRM Contacts. If so, it sets a variable to True. This variable is later evaluated to specify which folder it will be moved into.
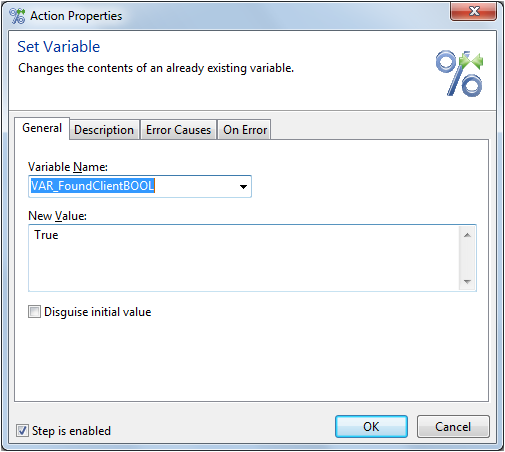
Step 8/9 – If the name from the email does match a contact record from Dynamics CRM, then we set our variable to “True” and break out of the loop. If there is no match, the value of the variable remains “False.”
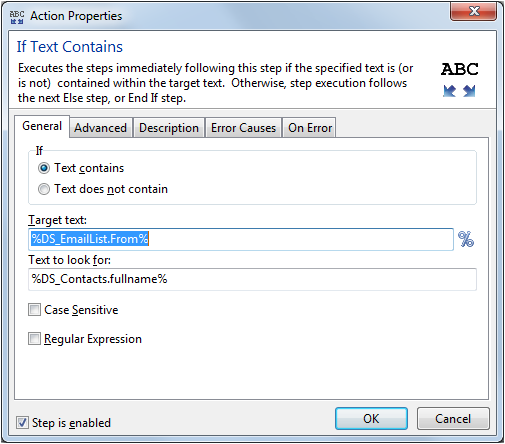
Step 13 – Once we have checked it against the CRM Client records, we need to evaluate the value of the variable. We are going to use the “If” action that is located in the flow folder.
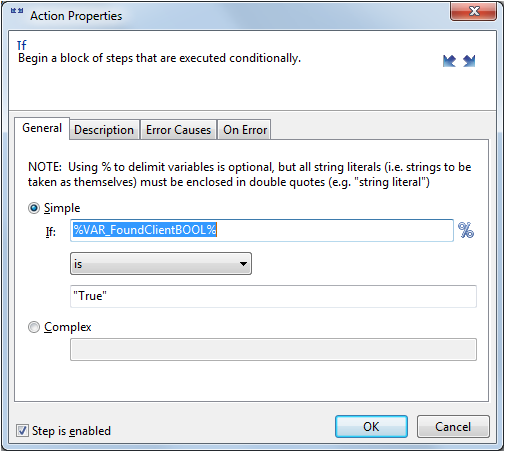
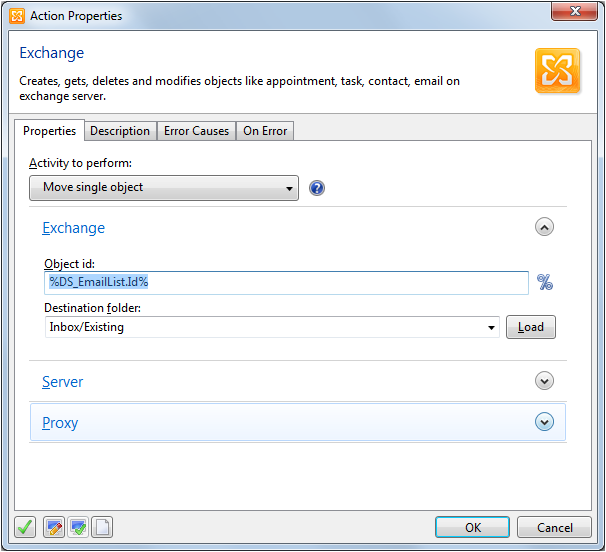
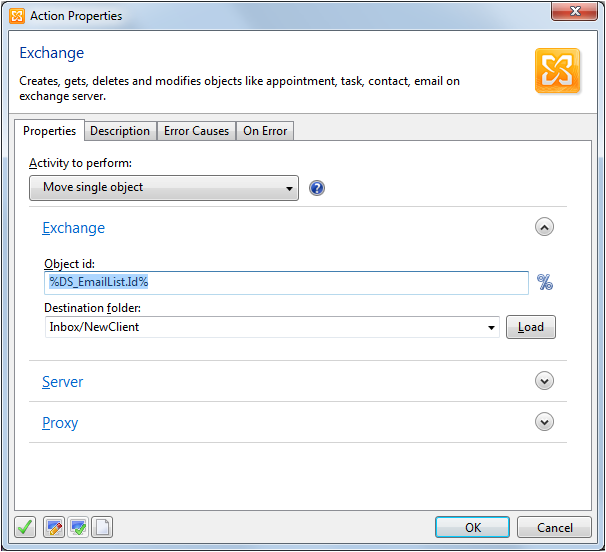
Step 14 – If the value of the Variable is “True” that means that a match was found. This means that the client already exists in our CRM system and so we are going to move the email into the Existing folder on our Exchange. Select the Exchange action and then specify “Move Single Object.” The Object ID will be the ID of the specific email it is checking against. The Destination folder will be the folder that you are moving the email to.
Step 16 – If the value of the Variable is false, that means that the client does not exist in your CRM System. This means that we need to move it into the appropriate NewClient folder for customer record creation.
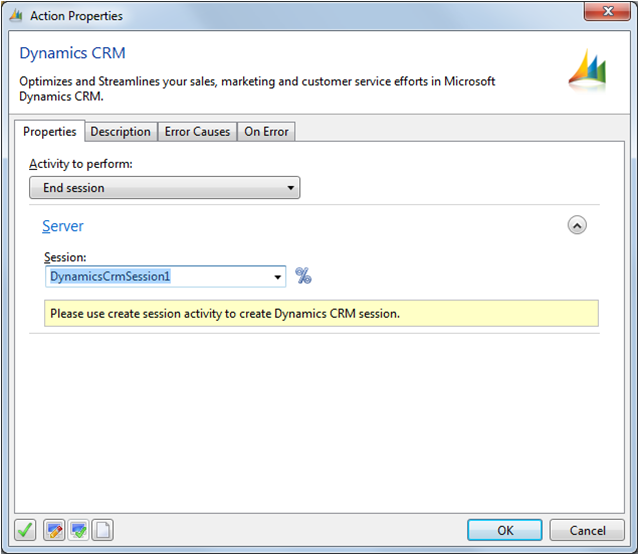
Step 20 – When everything has finished, close your Dynamic CRM session. Drag over a Dynamics CRM Action and select the End Session activity.
And that’s all there is to it.
The current market is saturated with automation solutions that are housed in CRM frameworks. However, migration from one CRM platform to another is disruptive and a rather larger undertaking. Also it is impractical to throw out an existing CRM instance for a completely new one in order to bring incremental improvements in automation. The costs are prohibitive, not just for the software, but the retraining, re-integration efforts and more. The solution discussed here, can be easily and cost effectively implemented with Automate. And with BPA, you can extend automation to other areas in addition to your CRM system.