Business success hinges on sharing relevant information with the people who need it. When members of your organization can make informed decisions, productivity increases and problems can be solved more creatively.
With Sequel Data Access, more business users within your organization can see these benefits on an even greater scale.
Not using Sequel yet? Learn more >
Using Sequel? Keep reading to learn how Sequel's view builder functionality makes it easy to access and manipulate data.
With the new view builder, Sequel administrators can use default settings to lead the user community through the process of designing Sequel views.
View builder was introduced in Sequel 11 and Viewpoint 11 as a way to assist novices in building Sequel views. The view builder also provides peace of mind regarding system and database security for IT and management.
Control User Access to View Builder
First, let’s look at Sequel default user settings and how you can set them to control who can access the view builder and what they see when they’re done designing a view. Through Viewpoint's administration settings, users are allowed or denied design rights. The assistance levels are set to control whether users can access view builder and what they see after completing the basic design. The user’s default setting for assistance level determines what design capabilities that user has.
Setting Defaults in Viewpoint Administrator
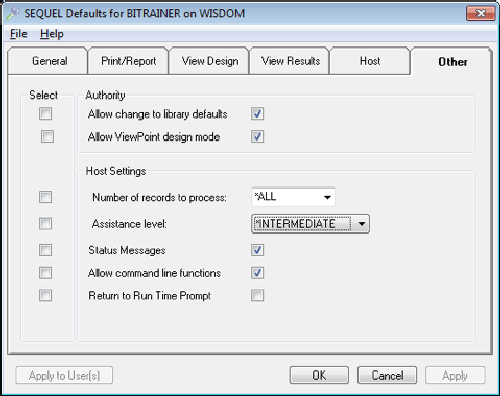
Set Sequel defaults to control which users have access to view builder and what they can accomplish within the tool.
As with other settings, an administrator can change multiple users’ settings at once by checking the box to the left of the setting and clicking the Apply to Users button.
Assistance Levels:
*BASIC (1): View creation and modification uses the view builder. Access is allowed to the view designer’s SQL and Files & Fields tabs. The Actions tab is presented upon view design completion.
*INTERMEDIATE (2): View creation and modification uses the view builder. Access is allowed to the view designer’s SQL and Files & Fields tabs. The view designer Files & Fields tab is presented upon view design completion.
*ADVANCED (3): View creation and modification uses the standard view designer. Access is allowed to the view designer’s SQL and Files & Fields tabs. The view designer Files & Fields tab is presented upon view design completion.
Now that you’ve established design levels for your business users, they can begin designing Sequel views with the view builder. As the users become more comfortable with the process and concepts, their assistance levels can be changed to provide greater access to some of the more advanced features and options.
Using View Builder to Access Data
The view builder is a separate window that consists of tabs for the user to select, or they can use the Next button to move through the steps to create most views.
The first tab, data source, allows users to connect to other databases as defined through "Viewpoint Administrator – Maintain Host Servers" and controlled by a setting in the defaults. Users can access data from Oracle, Microsoft SQL Server, MySQL, and other DB2 databases. Users can also be limited to a single system, like host IBM i or *Local Host, which uses their defaults. These can be set to the faster SQL Query Engine (SQE). Highlight the selection and click the Next button, which leads users to select their file(s).
View Builder Panel 1: Data Source
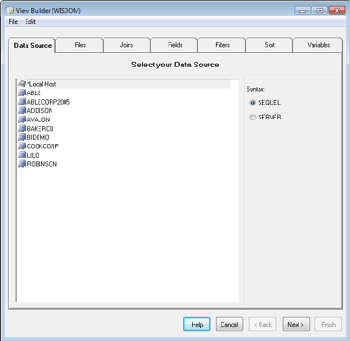
In the first view builder panel, users select their data sources.
The next step is selecting the files to use in the view definition. This step loads the user’s default for ‘From-file prompt library’ setting. Proper setting of this value takes the user directly into that library. Below, library SEQUELEX is the default. Enter all or a portion of the file name in the window to see the selectable files. Double-click or click the green down arrow to load the file(s) into the view definition.
View Builder Panel 2: File Selection
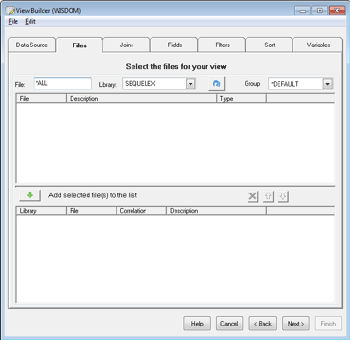
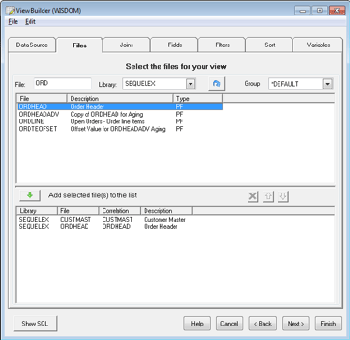
In the Files panel, users choose which files to load into the view definition.
If more than one file is selected, the Joins panel is displayed next. Viewpoint’s auto join feature automatically populates this information, so users can simply click Next.
The next step is the Fields panel. Again, double-click or highlight and click the green down arrow button to select the fields for the view. Fields can be designated for a grouping function here (SUM, MIN, MAX, AVG) or a count field can be added. Calculated or derived fields can be created at this point with the green plus sign button.
Users are presented with an edit window where they can create a new field. The Viewpoint Expression Editor window is available with the Editor button.
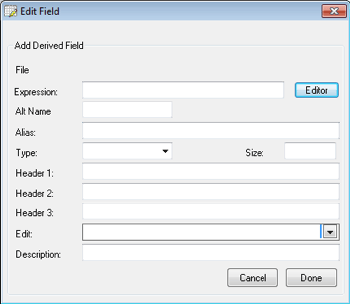
The edit window allows users to create new fields or access the Viewpoint Expression Editor.
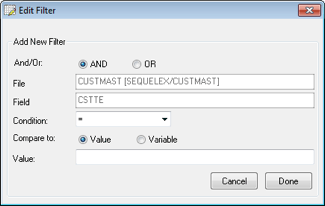
A filter can be added to the view in the next step. Filters can limit the amount or type of data the user sees. All fields from the files in the view can be used here. Double-clicking on a field allows users to edit the filter by adding the value. You can also create a variable to add run-time prompts to the view.
View Builder Panel 5: Filter
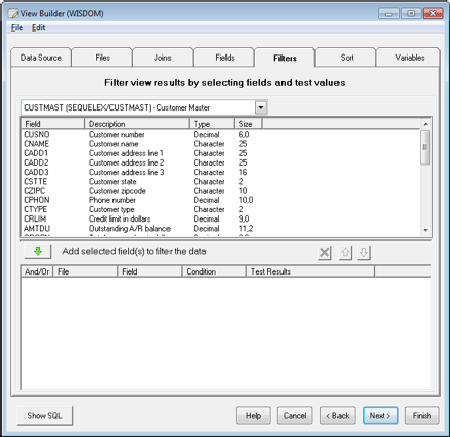
Users can select and edit filters from the Filters panel.
The next two panels allow you to add sort and variables specifics. Finally, when the user clicks the Finish button, the view builder ends.
Getting Results in View Builder
The next window that appears is dependent on the Assistance Level of the user (described above). For *BASIC users, an Actions tab is presented. From this tab, the designer is presented with the same options as usual, but with larger, easy-to-access buttons: save definition, display results, email, save results as PC file, save to repository, create files, and print results.
Actions Tab
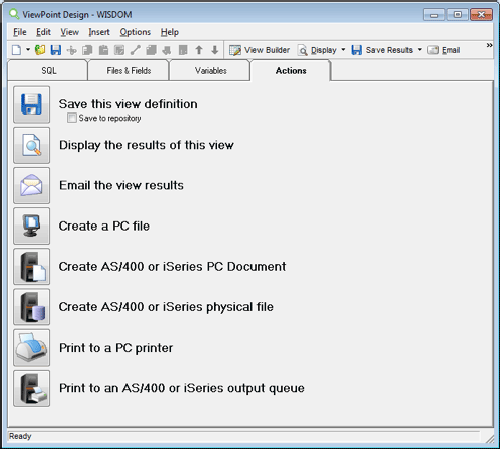
*Basic users will see an Actions tab after the view builder ends.
At this point, the results display is the same for all users—even advanced users who might have bypassed the view builder and designed the view on the "Files & Fields" tab.
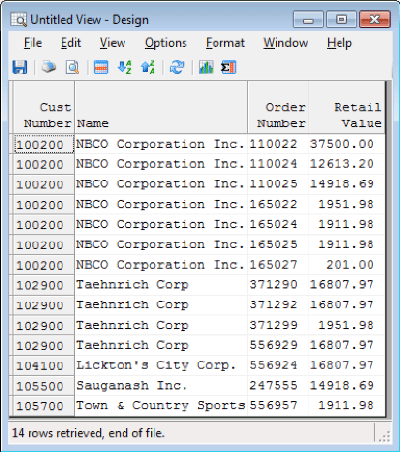
The results display is the same for all users.
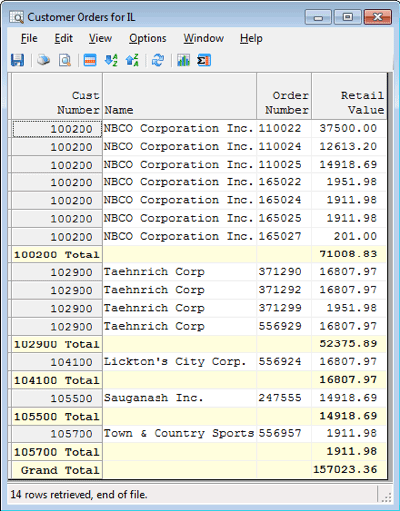
The results toolbar enables users to view results with subtotals.
Using the results toolbar, users can add subtotals and save them with the definition. View formatting, such as conditional highlighting, can also be added once the view definition has been saved.
With view builder, business users can begin designing their own Sequel views to see the data they need. This leaves IT departments free to accomplish higher level tasks, like complex reporting, system security, product upgrades, etc.
View builder is just one example of how empowering users with Sequel increases productivity in multiple areas of your organization—and leads to a more profitable business.
Get Better Data Access
If you're using Sequel Data Access today, you can keep building your skills with our diverse training options.