A SEQUEL Client Table is an interactive solution for dynamic Desktop Online Analytical Processing (Desktop OLAP or DOLAP) and cube analysis. With a Client Table, it’s possible for you to build client/server views that allow end users to explore, summarize, and pivot large quantities of data quickly from IBM i and other databases.
Once a Client Table is displayed, users can perform interactive analysis locally, including data filtering, drill-down, data marking, dimensional pivoting, ranking, print, preview, and graphing. And, all of this is available without changing your current relational or multi-dimensional database systems.
With a Client Table, you can quickly summarize data by giving thousands of records a more meaningful representation. The gathered information also can be easily exported as an Excel spreadsheet.
Client Table Data is Mobile
Saving Client Tables results as a .vpc object type turns your data into a portable, standalone module. Then, you use the Client Table Viewer to reorganize the data and view the results instantly without affecting the data in the database. And, you can do all this without connecting to the host server (unless you need to refresh the data).
Simple Wizard to Help Create a Client Table
Using the CTVIEW in the SEQULEX library, you can quickly build a Client Table.
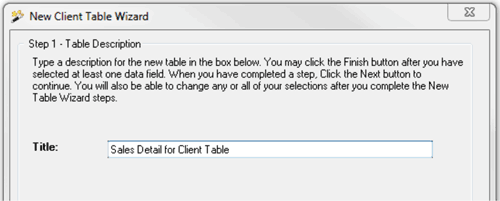
Step 1: Right click the CTVIEW view, select new, and then select Client Table. After defining the Title, click Next.
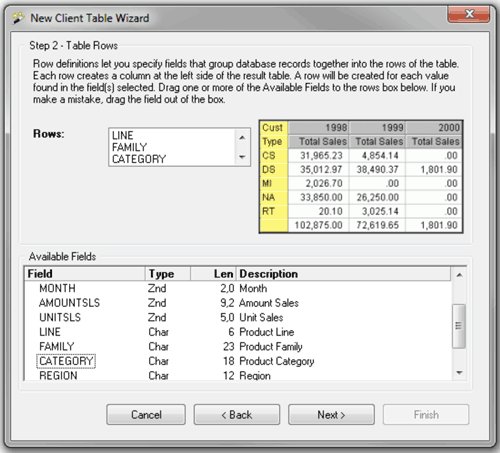
Step 2: Select the rows by dragging and dropping or double click the fields. You can select one or more rows as shown below. Click Next to continue.
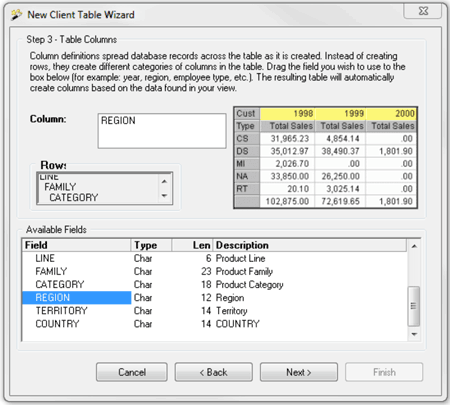
Step 3: Select the columns by dragging and dropping or double click a field. Click Next to continue.
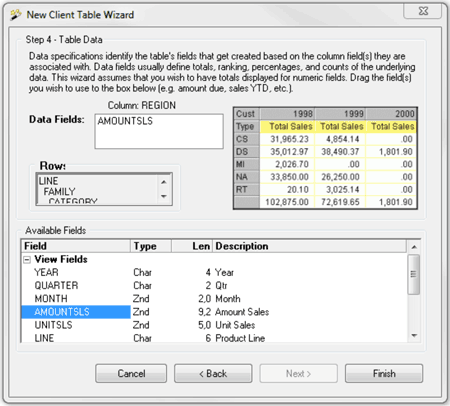
Step 4: Select the data fields by dragging and dropping or double click a field. You also can select multiple fields. Click Finish when done.
After walking through the wizard, a Client Table Design window pops up and allows you to make further changes such as pivoting, filtering, data marking, ranking, and more.
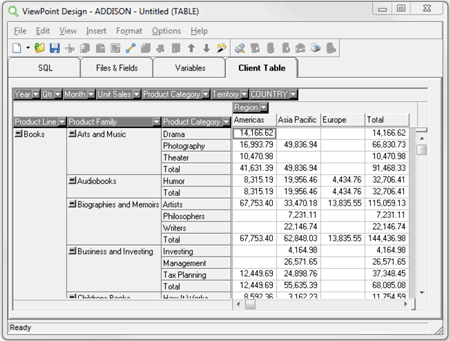
Client Table Design -- results will only show some of the records
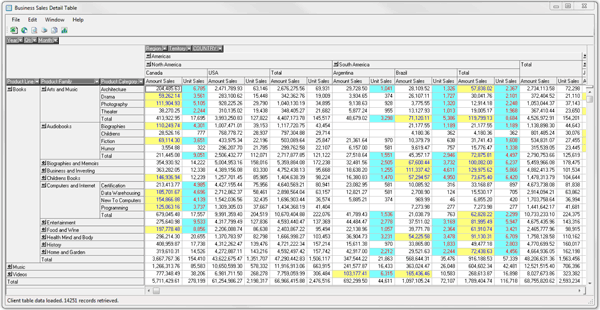
Client Table results after adding another data field, additional columns, suppressing some of the rows, and added a couple data markers (highlighting).
Bonus Tip: Creating a New Calculation
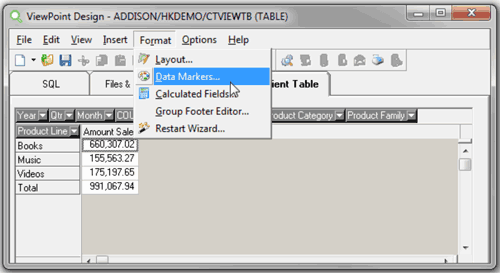
Creating new calculations for your client table is very easy. Once you’ve been through the Client Table Wizard and laid out the basic elements of the table, select Format\Calculated Fields from the Design menu.
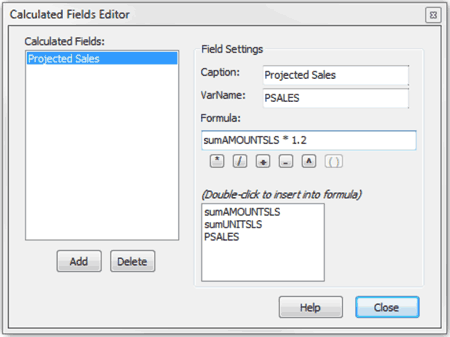
In the Calculated Fields Editor, complete the following steps:
- Click Add to create the new calculated field.
- In the Field Settings section, enter a caption (this will become the column heading in the table) and a VarName to be used internally.
- Enter the Formula for the new calculation. Here, we double-clicked the field, sumAMOUNTSLS, added the multiply sign (*), and entered a value of 1.2 to calculate projected sales.
- Click Close to see the new column in the table. The new calculation is added instantly to the results.
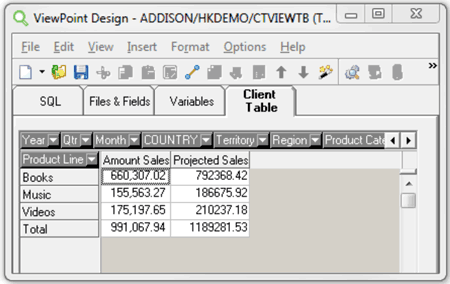
Result with new calculation
You can easily add these techniques (and more) to customize your Client Tables. Give them a try and see how your data becomes meaningful information. Watch this informative video to learn more about the power of Client Tables.
Looking for more Sequel tips and tricks?
Check out the Fortra Community Portal for more articles and forums with other Sequel customers.