If you’re familiar with IBM i system security, the Robot Schedule system is easy. IBM i provides a security system that restricts rights to objects. Robot Schedule builds on that system with an optional security system that allows you to restrict the right of users to change various Robot Schedule functions or job data. If you’re familiar with system security, it makes learning Robot Schedule security very easy.
The Robot Schedule security system allows you to secure the following parts of the software:
- Menus
- Menu options
- GUI objects
- Job schedule lists
- Job schedule list options
- Schedule override codes
- Specific jobs
- Robot Schedule Enterprise agents
To enable Robot Schedule security, select System Setup in the Robot Schedule Explorer then right-click System Defaults and select Properties to display the System Defaults window. Select Use Schedule’s security system on the Default Options tab.
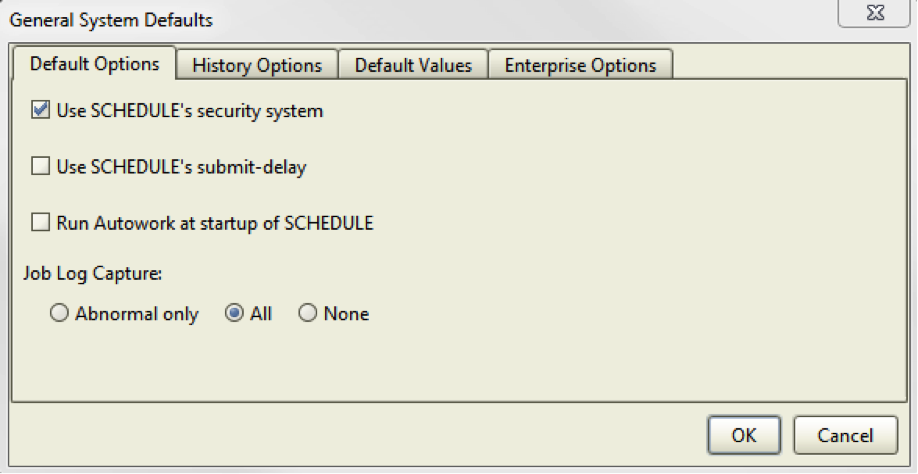
Figure 1: Enable the security system on the Default Options tab of the System Defaults window.
Robot Schedule security uses a hierarchical system. For example, you can secure each major function. When a user profile is restricted at the main level, it automatically restricts each option under that level. If you already have group profiles and authorization lists set up for IBM i system security, you can also use them in Robot Schedule. In situations involving multiple objects, each with different security restrictions, Robot Schedule uses the most restrictive permissions.
Secure Menus and Options
Select System Setup from the tree view to display the Robot Schedule security configuration options:
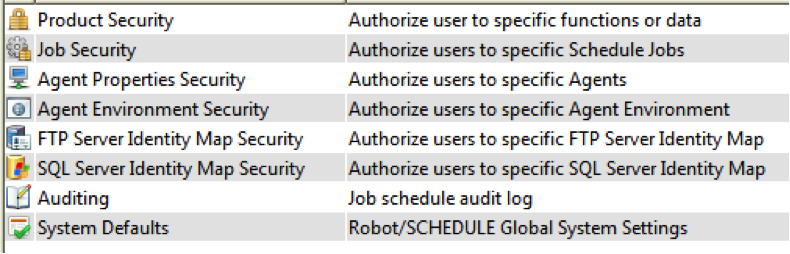
Figure 2: These are the System Setup options for security, auditing, and defaults.
When you select Product Security, the Product Security window lists all the objects in Robot Schedule that can be secured. It is an extensive list of all menu options and functions that can be used for jobs. The security system manages both the GUI and green screen functionality simultaneously. To help you out, we’ve made a cross-reference guide between GUI and green screen secured objects for Robot Schedule available in our self-service resources.
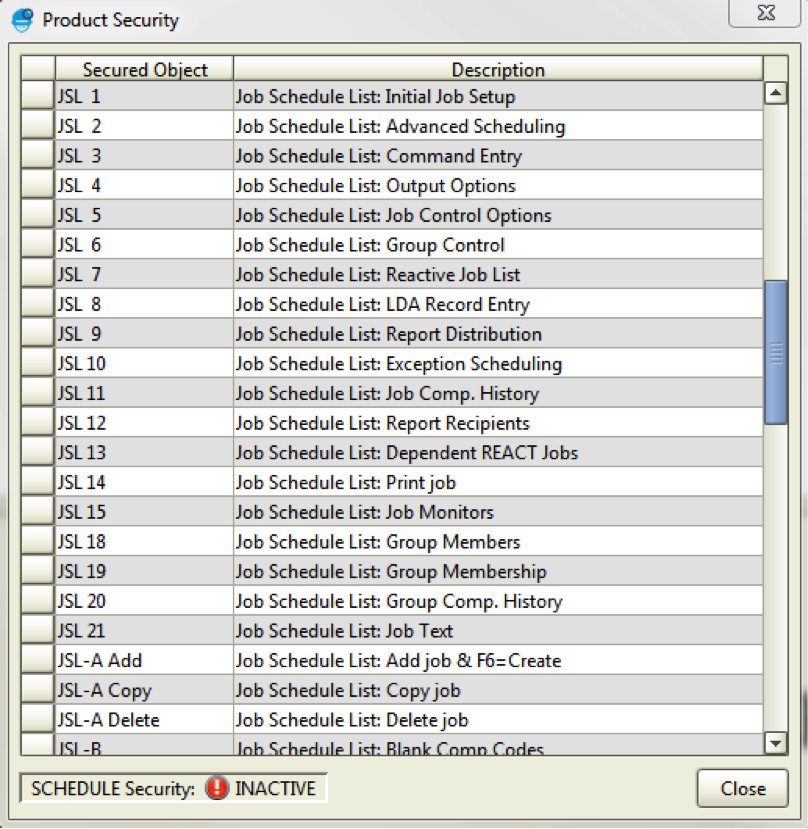
Figure 3: Browse the list of Product Security options.
Select the object you want to secure, right-click, and select Properties. Use the Edit User Authorities window to specify the user, group, or authorization list that can access the object and their security privileges. Notice that for some options, such as Main Menu (option 1 on the green screen), you have different user authority options such as Display Only. Use this option for those users who don’t need editing capability but still need to be able to see job setup.
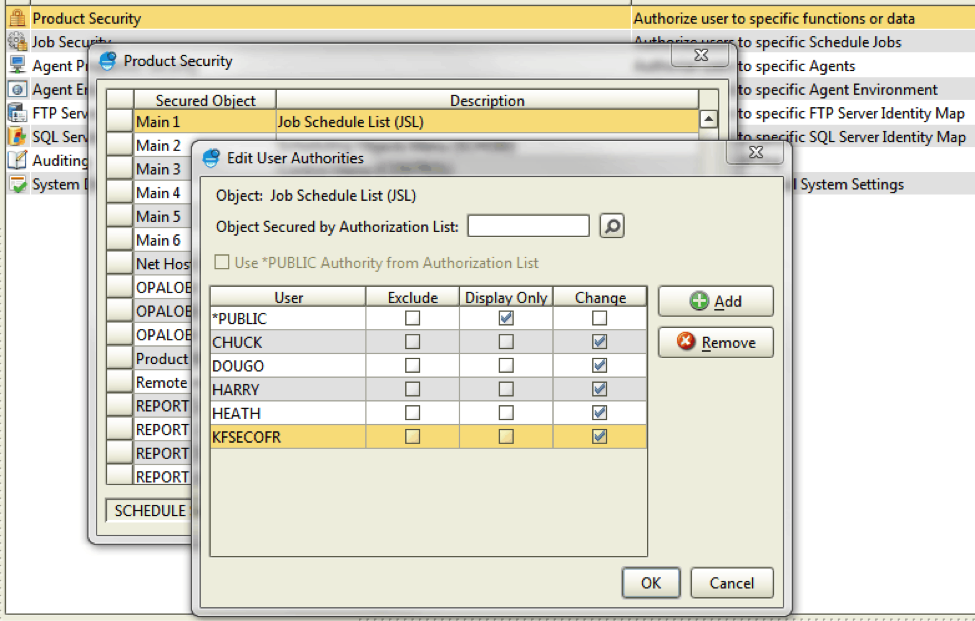
Figure 4: Edit user authorities.
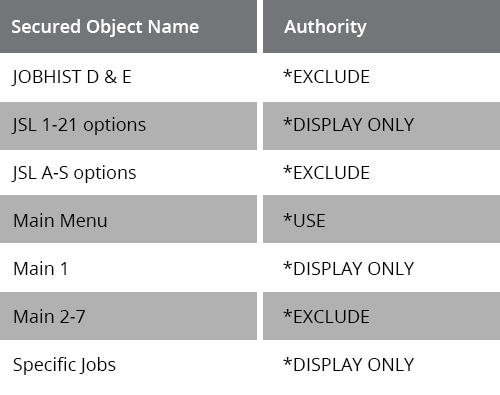
Here’s a quick guide to setting up *PUBLIC users for a Display Only view of jobs. These settings exclude *PUBLIC from all functions except for the ability to display job properties:
Secure Robot Schedule Enterprise Servers
If Robot Schedule Enterprise is also installed on your system for integrating and executing Windows, UNIX, and Linux tasks and job streams, there is also an option for securing the individual servers from use. Only users with change authority will be allowed to schedule a job using that agent.
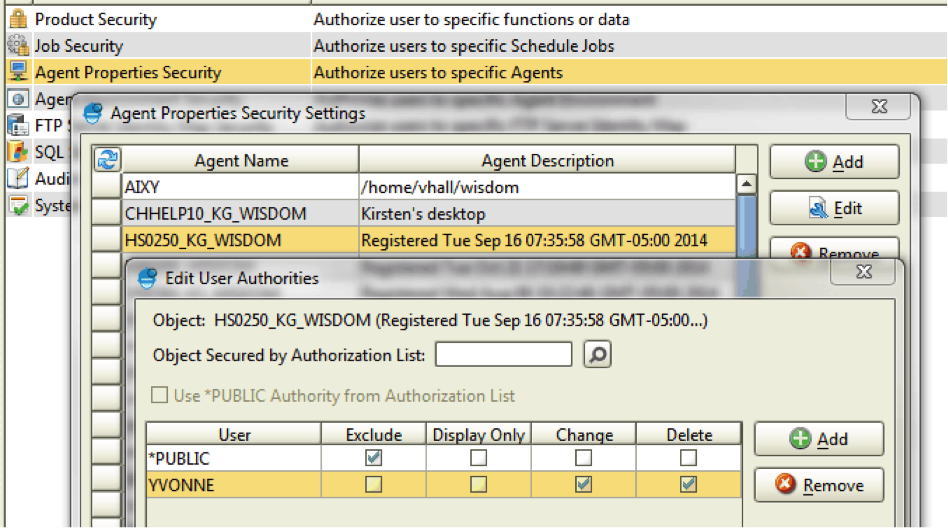
Figure 5: You can make changes to Robot Schedule Enterprise agent security settings.
Note: If the user profile belongs to the user class *SECOFR or has *ALLOBJ security, the user will have authority to all menus and options in Robot regardless of the entries in the Robot Schedule security settings.
Robot Schedule also offers an optional job security system that allows you to set user authority to specific jobs. For example, you can secure any job that involves sensitive data, such as auditing or accounting jobs. Whoever originally sets up a job is automatically granted all authority to the job. Your security officer can edit this authority at a later time.
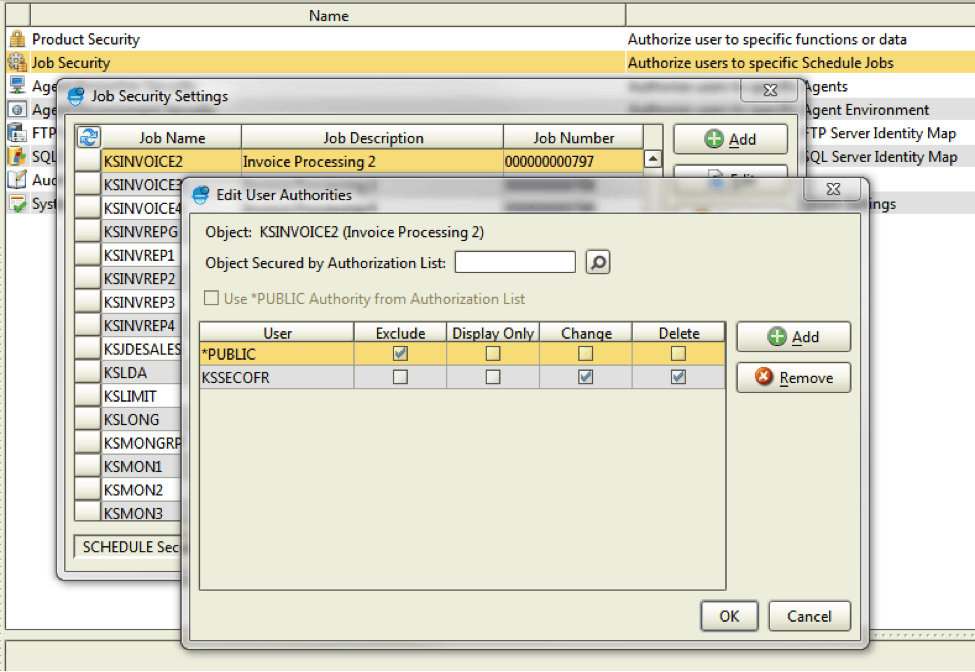
Figure 6: View security configuration at the job level.
The Job Security Settings window lists all jobs defined to Robot Schedule. To edit the security authorities of any job listed, select a job, right-click, and select Properties. The Edit User Authorities window displays, allowing you to specify the users that can access the job and their security privileges.
Using the RBTGRTAUT Command
You also can set up security by using the Grant Robot Authority (RBTGRTAUT) command. This command has the advantage of allowing you to secure all Robot Schedule objects (*ALL) plus menu options, just like the GUI. The parameters also allow you to secure your jobs by application name, which could come in handy.
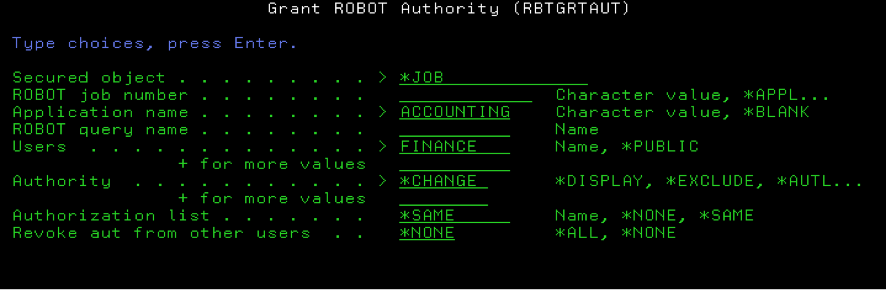
Figure 7: RBTGRTAUT assigns authority to jobs by application name in the job’s setup.
Tip: One way you might use the RBTGRTAUT command is to schedule it to run each day to repair any security problems that might have been introduced. For example, run the command against jobs by application to ensure your security is set up as you want it.
Record Your Security Setup
You can document your security setup with the Security Setup Report, which also helps you double-check your work and prove to your auditor that your scheduling system on IBM i is configured.
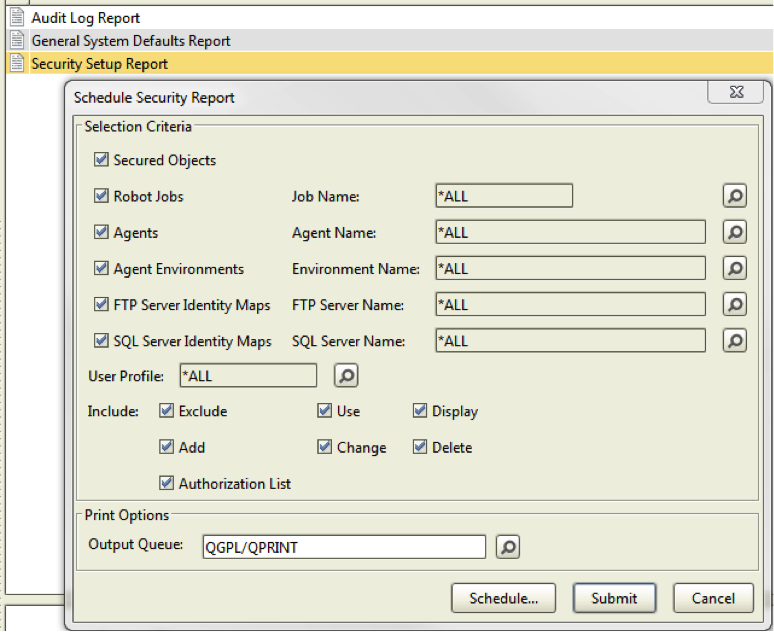
Figure 8: Select criteria to generate a Schedule Security Report.
If you have specific compliance requirement around Sarbanes-Oxley or at least abide by the COBIT framework, we have a guideline for Robot Schedule compliance available that also talks to using the Robot Schedule built-in auditing and process reporting as well as the security features.
IBM i is one of the most secure systems in the world, but assuming that no one knows how to get in and change jobs, update schedules, or otherwise sabotage your pristine Robot environment is not a smart way to secure your schedule. Don’t take IBM i security for granted by leaving Robot Schedule vulnerable when it could be easily remediated.
If you have any questions about properly configuring Robot Schedule security, please contact us.
Get Started
Find out how IBM i workload automation software can help you improve the efficiency of your job schedule. Request a free demo today.