How many times do you have to visit a website in your daily work? Do you spend a lot of time compiling pricing information from competitors? Or maybe you monitor your company's website to ensure pages with critical information are up and running. These tasks seem simple, but they can add up over time and eat up a big chunk of your workday. But with website automation, you can easily set up a software robot to handle any of your browser actions, including Google Chrome automation.
Blog Content:
Ways to Automate Chrome
Before we get started, let’s talk about some of the ways you can use robotic process automation software RPA for web-related tasks involving Google Chrome. Here are just a few use case examples of Chrome automation:
-
Website Testing
Use RPA to automate website testing in Google Chrome. This includes testing different scenarios, such as login processes, form submissions, and other types of user interactions. -
Web Scraping
Easily scrape information from websites in Google Chrome. This includes extracting data from websites, such as product information, pricing, and other types of data that is used for analysis and decision making. -
Data Entry
You can also use Automate for data entry tasks in Google Chrome. For example, automate the process of filling in forms on a website or a web application. -
Data Extraction and Transformation
RPA can be used to extract data from websites, transform it, and then load it into other systems. For example, you can extract data from a website and load it into a database, Excel spreadsheet, or other applications. -
Order Processing
Use RPA to take over order processing tasks in Google Chrome. For example, you can automate the process of checking orders, verifying payment information, and updating order statuses.
Related: 20 Ways Automate Solves IT and Business Problems: Use Case Guide >
How to Automate Chrome
Google Chrome has quickly become one of the most used web browsers. That’s why we’ve put together this step-by-step tutorial on how to use Automate, our robotic process automation software, to make a bot for Chrome-related tasks and achieve web browser automation.
1. Download a free trial of Automate, our robotic process automation software (RPA).
2. Open the Automate Task Builder and click on New Recording to launch the Automate Recorder.
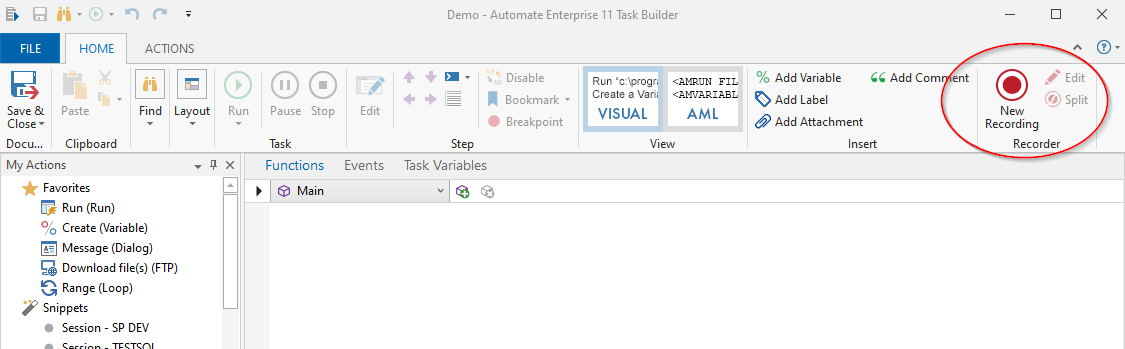
3. From the Automate Recorder, click the Web icon.

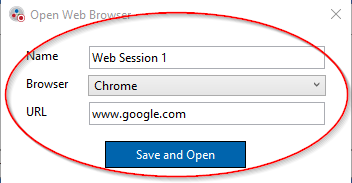
4. From the Open Web Browser dialogue, select Chrome from the list of supported browsers and enter the URL of the page that you want to open and then press Save and Open.
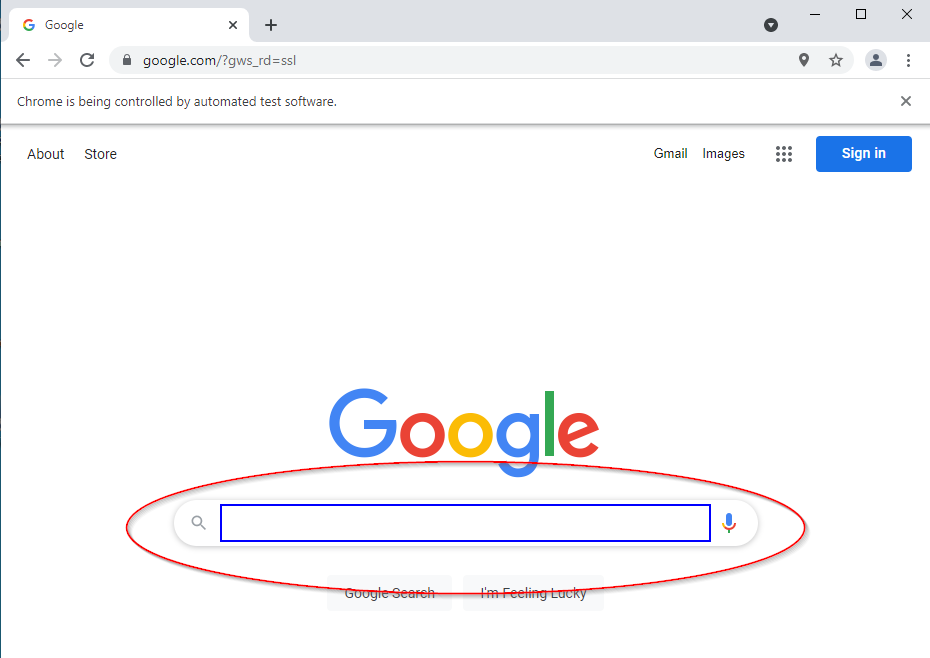
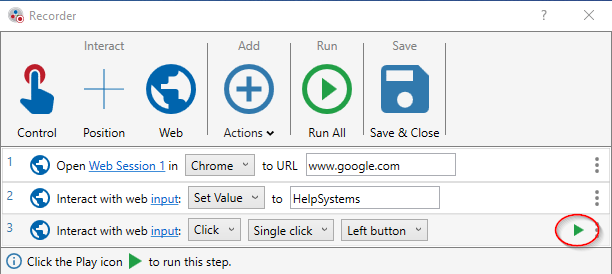
5. Using the mouse, hover over the element you would like to interact with on the newly opened browser and then click the element once Automate has identified it. Automate will outline in blue all the detected elements and capture the attributes in the background.
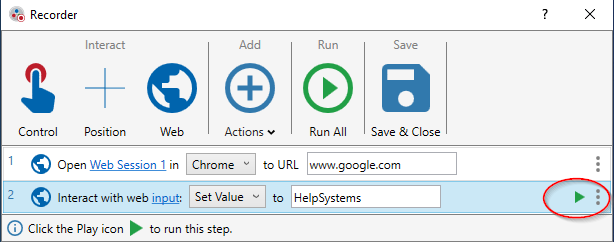
6. From the Automate Recorder interface, change the newly added interaction step to Set Value and then enter the text to be set.
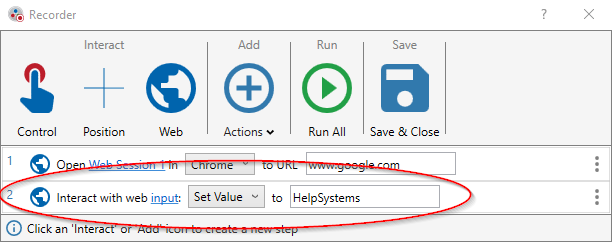
7. The step-based approach of the Automate Recorder allows you to test each step in the process, not relying on a macro driven design. With the newly added step selected, press the Play icon to test the interaction with the element.
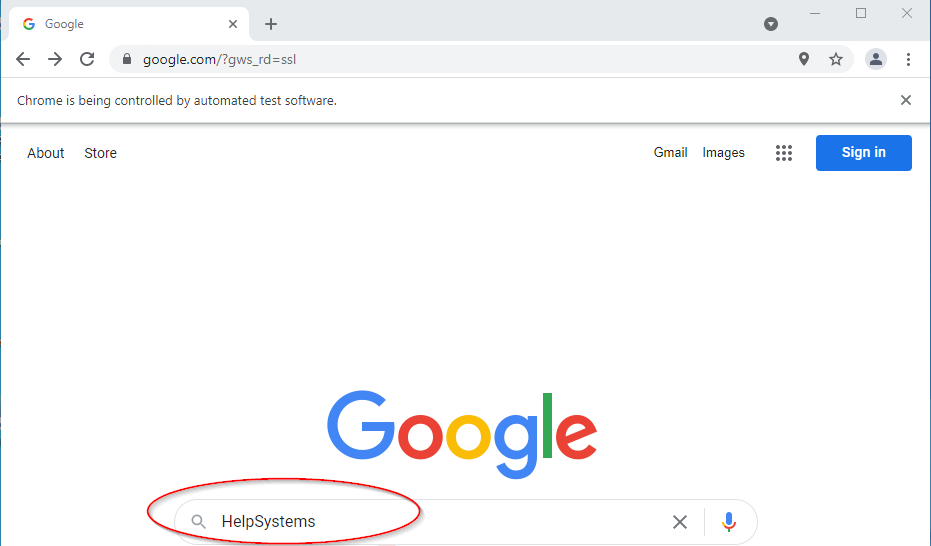
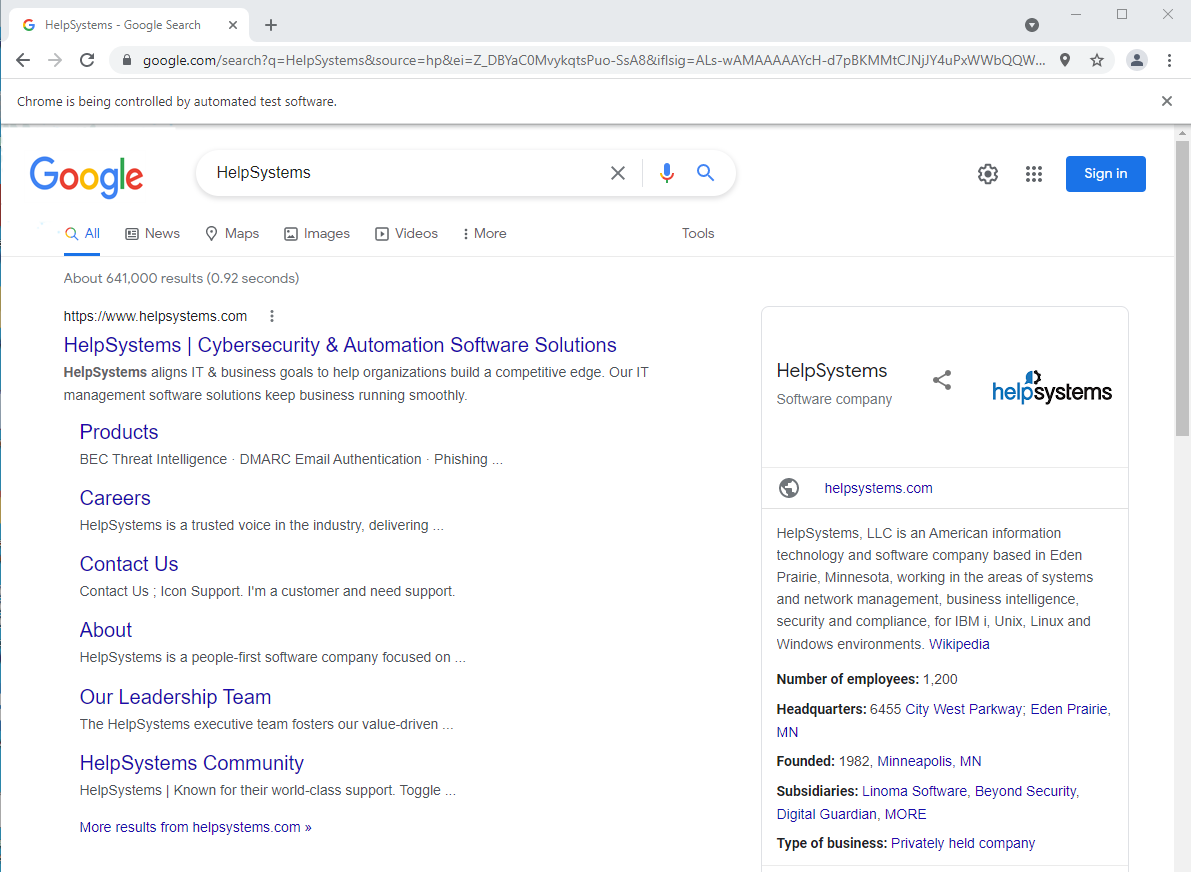
Your results should look like this:
8. From the Automate Recorder interface, press the Web icon again to interact with another element on the browser.
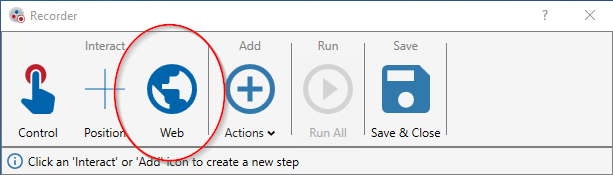
9. Then hover the mouse over the desired element and click it once Automate has identified it. Automate will outline in blue all the detected elements and capture the attributes in the background.
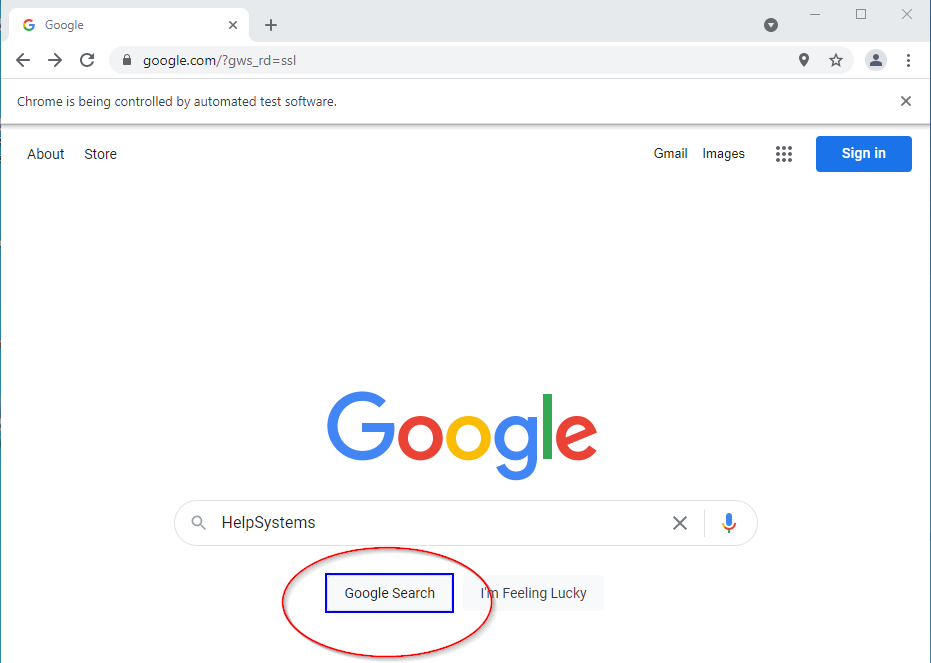
10. From the Automate Recorder interface, with the newly added step selected, press the Play icon to test the interaction with the element.
Your results should look like this:
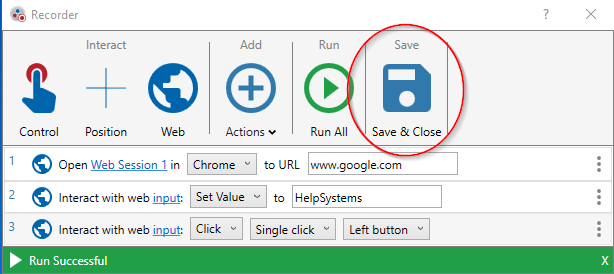
11. With the GUI steps completed, click Save & Close from the Automate Recorder Interface.
12. The Automate Task Builder will now contain a Recording Region and the web browser actions are automatically added.
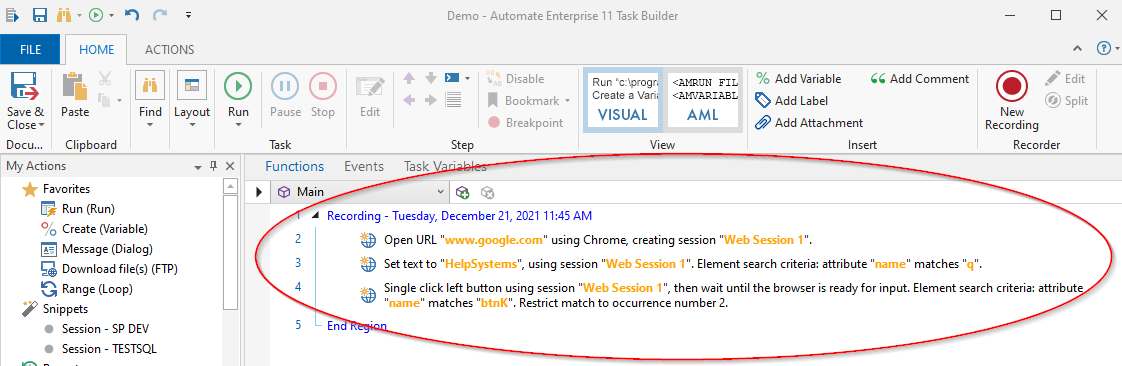
13. You can re-run the steps for the Automate task from either the Automate Task Builder or you can edit the recording steps and run the task from the Automate Recorder.
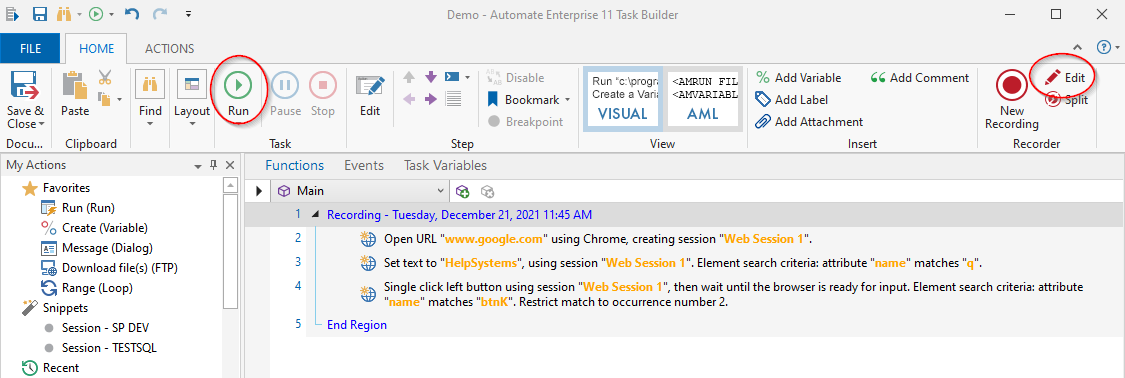
14. In either case, the task will open an instance of Chrome, enter the text “Fortra” in the search field and press the Google Search button.
Benefits of Chrome Automation
Web browser automation lets you set up a task to automatically scrape data from any website—making it easy to get the latest pricing information. And you can set up an automation task to monitor pages of your website to alert you if anything goes down or information isn’t rendering correctly.
Web browser automation bots mimic human behavior like opening, navigating, and closing browsers, and clicking on links, buttons, and entering keystrokes. Automate can automate web browser actions from the most-popular browsers, including Internet Explorer, Safari, Firefox, and Google Chrome. And with the Automate Recorder, non-technical users can easily build web browser automation tasks to quickly get up and running with automation.
Get Started with Chrome Automation
Download a free trial of Automate to set up your own Chrome browser automation task in minutes.